Web App with Jupyter Notebook in 2 steps
We will create a web application with Jupyter Notebook and Mercury. We will do this in 2 steps:
- We will create a Python notebook in Jupyter Notebook.
- We will serve notebook
hello-world.ipynbas web app with Mercury.
We will use Mercury Widgets to make notebook interactive. You will be able to use widgets during the notebook development and in Mercury.
Please make sure that you installed Mercury package:
pip install mercuryYou will also need matplotlib package.
Create Python Notebook
Let's create a new notebook hello-world.ipynb.
When creating a new notebook, please make sure that you have selected Python kernel with mercury package installed.
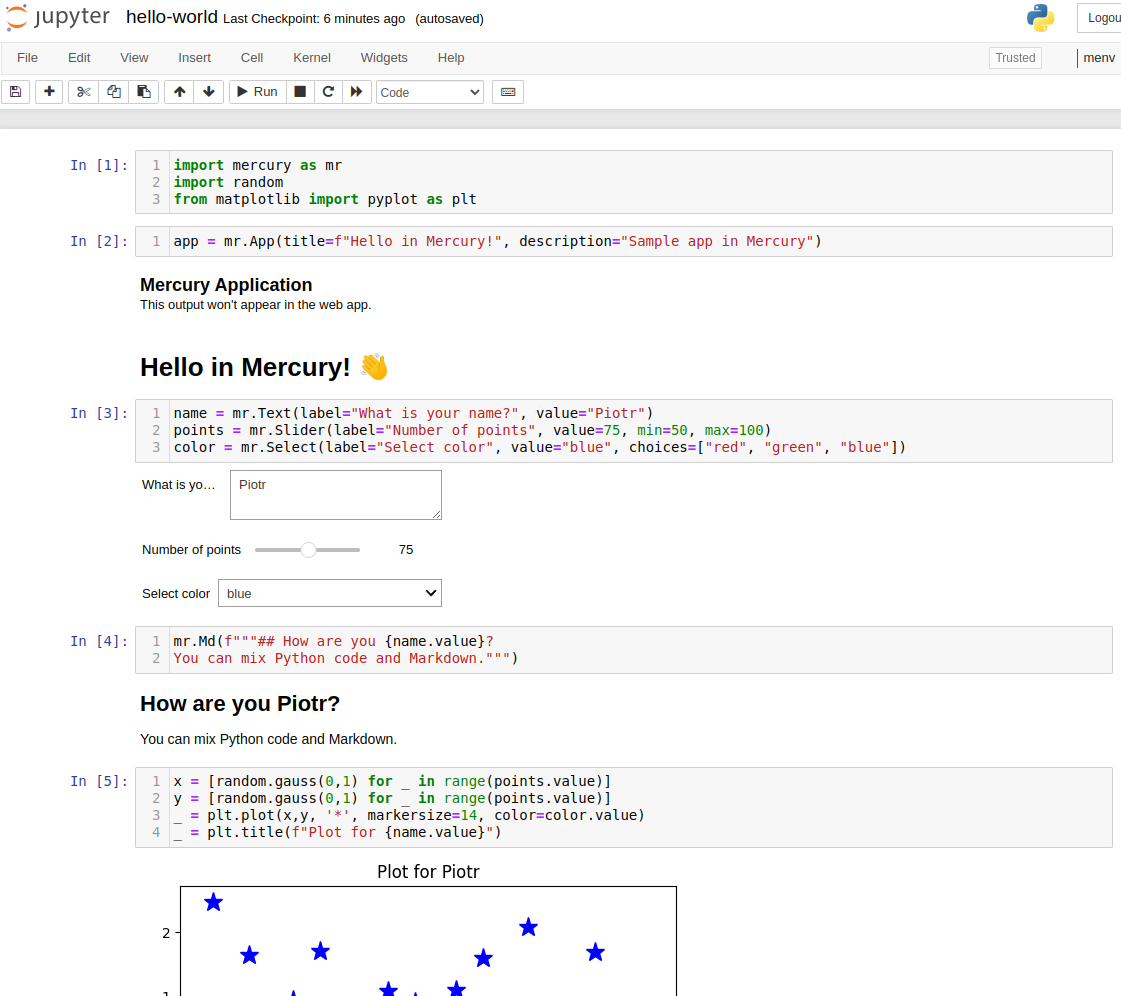
The first cell will import needed packages:
import mercury as mr # for widgets
import random # for random data generation
from matplotlib import pyplot as plt # for chart
In the second cell, we will configure Mercury App properties: title and description:
app = mr.App(title="Hello in Mercury!", description="Samples app in Mercury")In the App object you can also decide to show or hide notebook's code.
The default is set to hide code. Please add show_code=True argument in the constructor to show code in Mercury App.
After executing this cell you will get information about Mercury Application, don't worry about it. It will not be displayed in Mercury App.
The next cell is Markdown type. It is a simple header:
# Hello in Mercury! 👋In the following cell, we will add Mercury Widgets:
name = mr.Text(label="What is your name?", value="Piotr")
points = mr.Slider(label="Number of points", value=75, min=50, max=100)
color = mr.Select(label="Select color", value="blue", choices=["red", "green", "blue"])
Please note, that after cell execution widgets are displayed. You can interact with them. Their values will be changed. However, no additional actions are performed.
Let's add a Markdown text with value of the name widget:
mr.Md(f"""## How are you {name.value}?
You can mix Python code and Markdown.""")
We have used Md to create Markdown with Python variables. The name.value is returing the value of mr.Text widget.
In the last code cell, we will do a matplotlib chart:
x = [random.gauss(0,1) for _ in range(points.value)]
y = [random.gauss(0,1) for _ in range(points.value)]
_ = plt.plot(x,y, '*', markersize=14, color=color.value)
_ = plt.title(f"Plot for {name.value}")
We are using points.value and color.value to access widgets' values.
The notebook preview in the Jupyter Notebook

Run Mercury App
Please run the following command in the same directory as your hello-world.ipynb notebook:
mercury runThe Mercury will detect all notebooks in the current directory. It will start a local server.
You can open a web browser at address http://127.0.0.1:8000 to see Mercury app. Please open the notebook with title Hello in Mercury!.
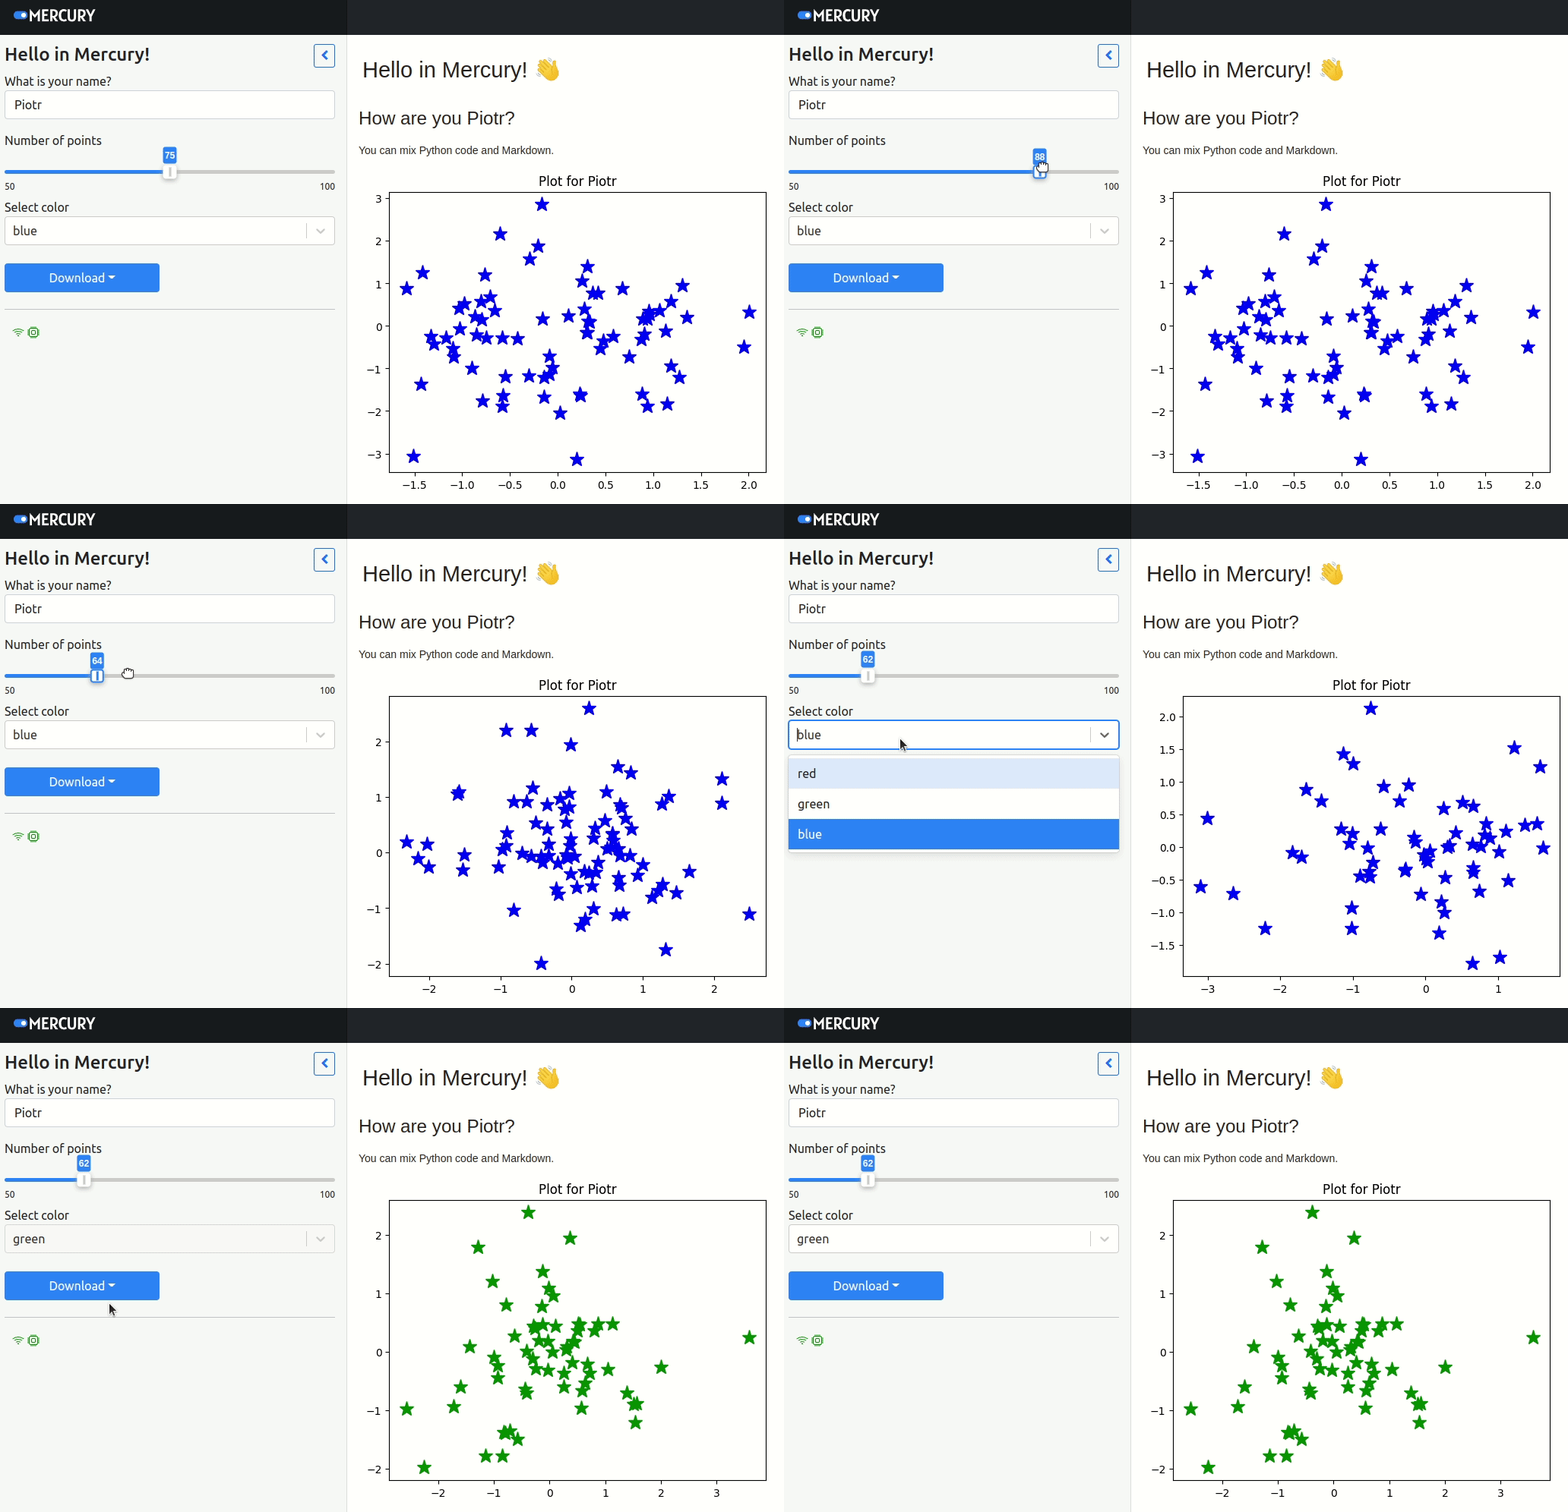
You will see the app similar as in the animation below. You can play with widgets values and the notebook output displayed on the right side will be automatically updated.

You can change code in the Jupyter Notebook (rember to save it) and Mercury will detect file change and will update the app instantly.
Example ways you can use to customize and extend your app:
- Set custom welcome message.
- Use more input widgets and output widgets.