Display PostgreSQL data as an interactive table in Jupyter Notebook using Python
Retrieve data from PostgreSQL
You will need following packages:
mercury
pandas
psycopg2
dotenv
osmercuryis a package for turning notebooks to web apps.pandasis for data manipulation.psycopg2allows to connect with the database.dotenvis for storing secrets.osallows to do basic system operations.
Make sure that you have installed them before start doing anything.
1. Import packages
Firstly, install required packages:
import mercury as mr
import pandas as pd
import psycopg2 as ps
from dotenv import load_dotenv
import os
2. Connect with database
Then, create a function which allows to connect with database:
load_dotenv()
def db_engine():
    host = os.environ.get("DB_HOST")
    port = os.environ.get("DB_POST")
    user = os.environ.get("DB_USERNAME")
    password = os.environ.get("DB_PASSWORD")
    db = os.environ.get("DB_DATABASE")

    return f"user='{user}' password='{password}' host='{host}' port='{port}' dbname='{db}'"
To keep credentials safe we use dotenv method.
You can get more information about in our article: 3 ways to access credentials in Jupyter Notebook (opens in a new tab)
After that, connect with your database. Use try block to detect possible errors.
try:
    conn = ps.connect(db_engine())
except Exception as e:
    print(f"problems: {e}")
3. Send queries
Now, you have to create a queries using SQL. Here an example query:
query = "select username, id, email, last_login::date, date_joined::date from auth_user;"4. Get responses
To get responses update try block:
try:
    conn = ps.connect(db_engine())
    cur = conn.cursor()
    cur.execute(query)
    response = cur.fetchall()
    cur.close()
except Exception as e:
    print(f"problems: {e}")
cur = conn.cursor()creates a cursor that allows your program to move around your database.cur.execute()sends your query.cur.fetchall()gets a response for your query.cur.close()closes a cursor.
Turn data into an interactive table
After you got all of needed information from the database, it's time to display them as an interactive table.
Convert your Data into DataFrame using pandas :
df = pd.DataFrame(response, columns=['Username', 'ID', 'Email', 'Last login', 'Data joined',])It's important to name all of colums, no more, no less.
Next, use Table Mercury Widget to create an interactive table. Write following code:
mr.Table(data=df, width="auto")datais a name of DataFrame which you want to show in table.widthsets width of columns in table.
Result
After all, your code should look like this:
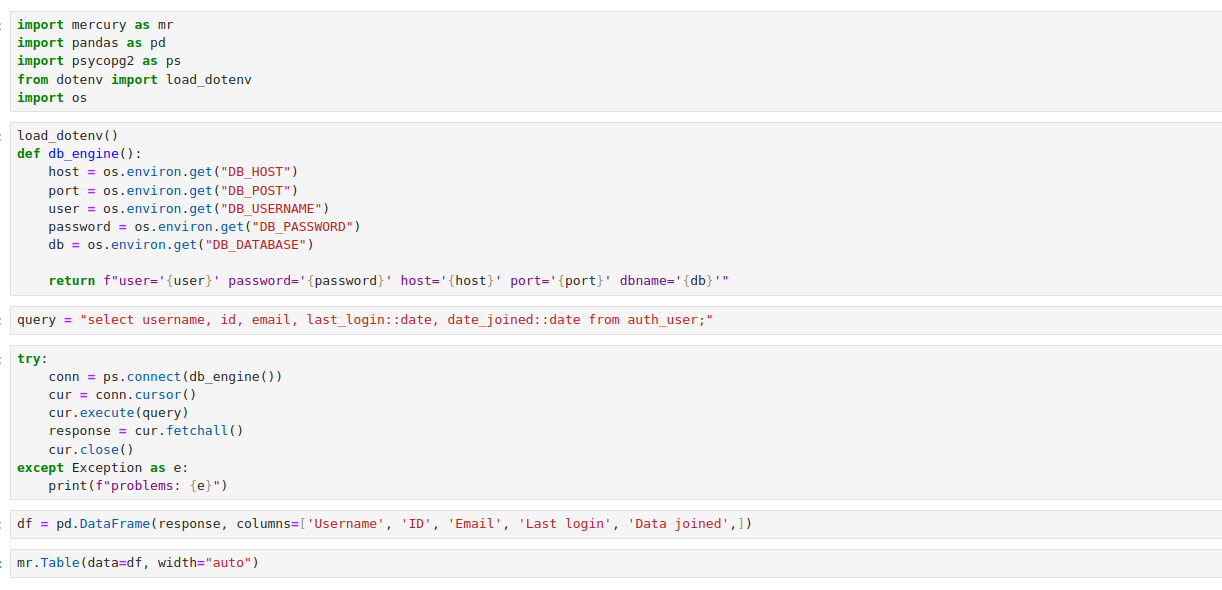
And here is the result:
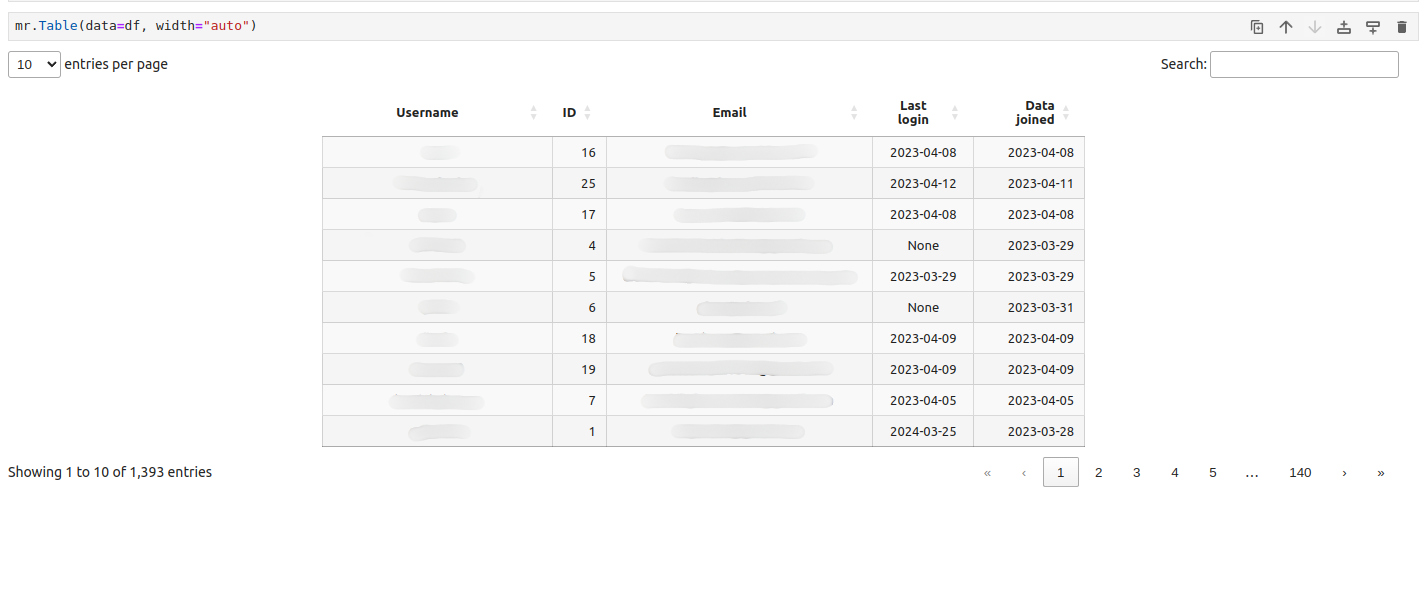
We blured username and email columns for legal reasons.
Share with other users
Create a site
You have to create site. If you have any problems with it, get more information in our docs.
Upload files
Then, you need to upload your notebook. Click Upload files button on your site dashboard.

Then, choose file which you want to upload and confirm it.
Share your site
After all, it should look like this:
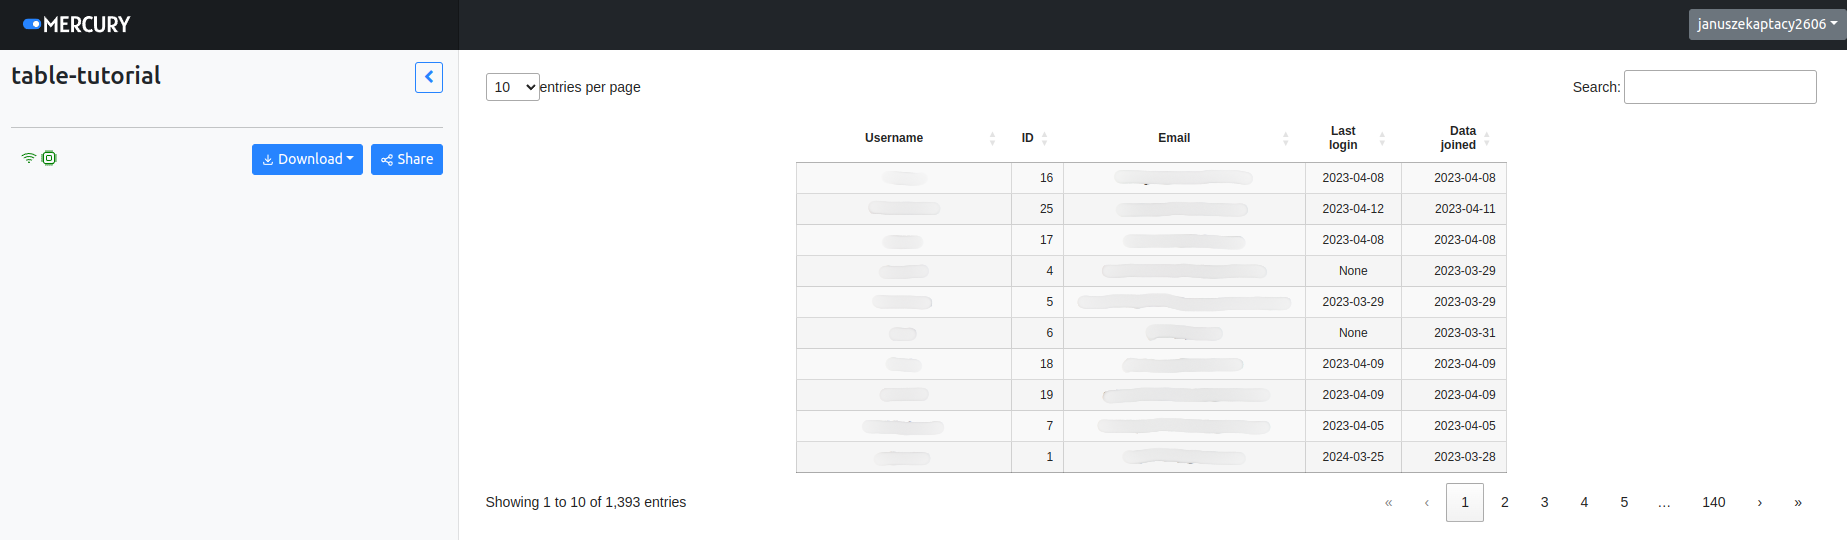
We blured username and email columns for legal reasons.
Now you can share your site with other users!