Streaming LLM Chatbot
In this tutorial we will build a simple chatbot web app that streams the response token-by-token (as the model generates it). This gives a nice the assistant is typing feeling.
We will use only open-source tools:
- Ollama to run the model locally
- GPT-OSS 20B as the model (you can switch to any Ollama model)
- Python programming language
- Mercury to turn the notebook into a web app
The full notebook code is vailable in our Github repository.
1. Install and run Ollama
Section titled “1. Install and run Ollama”Install Ollama using the official quickstart: https://docs.ollama.com/quickstart
In this example I’m using GPT-OSS 20B.
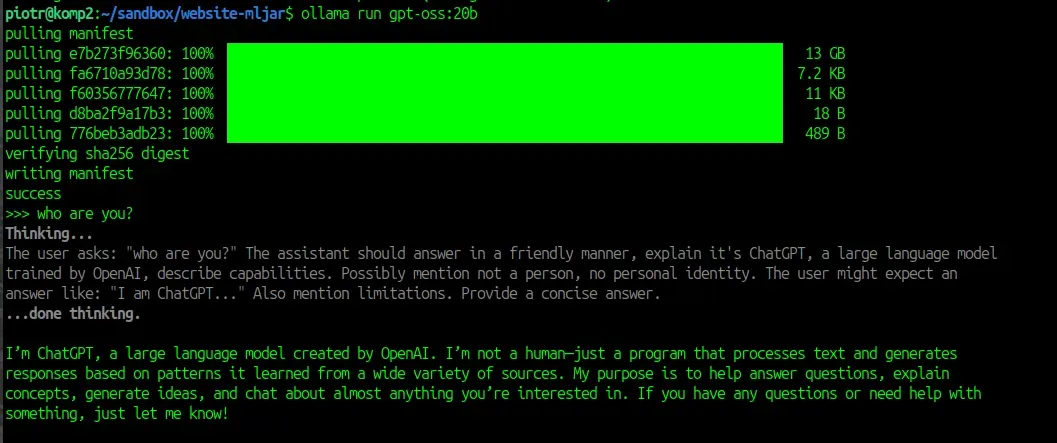
To download and start the model, run:
ollama run gpt-oss:20bDonwload will take few minutes, depending on your internet connection. You are ready to use the model in the terminal:
2. Install Python packages
Section titled “2. Install Python packages”We need two packages:
ollama(Python client)mercury(widgets + app runtime)
Install them:
pip install ollama mercuryNow import them in the first cell:
import ollamaimport mercury as mr3. Create storage for the conversation
Section titled “3. Create storage for the conversation”We will keep the whole conversation in a list called messages.
Ollama expects messages in the same format as many chat APIs: a list of dicts with role and content.
# list with all user and assistant messagesmessages = []Why do we need this list?
Because each new response should include the conversation history, so the model has context.
4. Add UI widgets: Chat + ChatInput
Section titled “4. Add UI widgets: Chat + ChatInput”Chat widget (message display)
Section titled “Chat widget (message display)”We use the Chat widget to display the conversation.
The placeholder is shown before the first message appears.
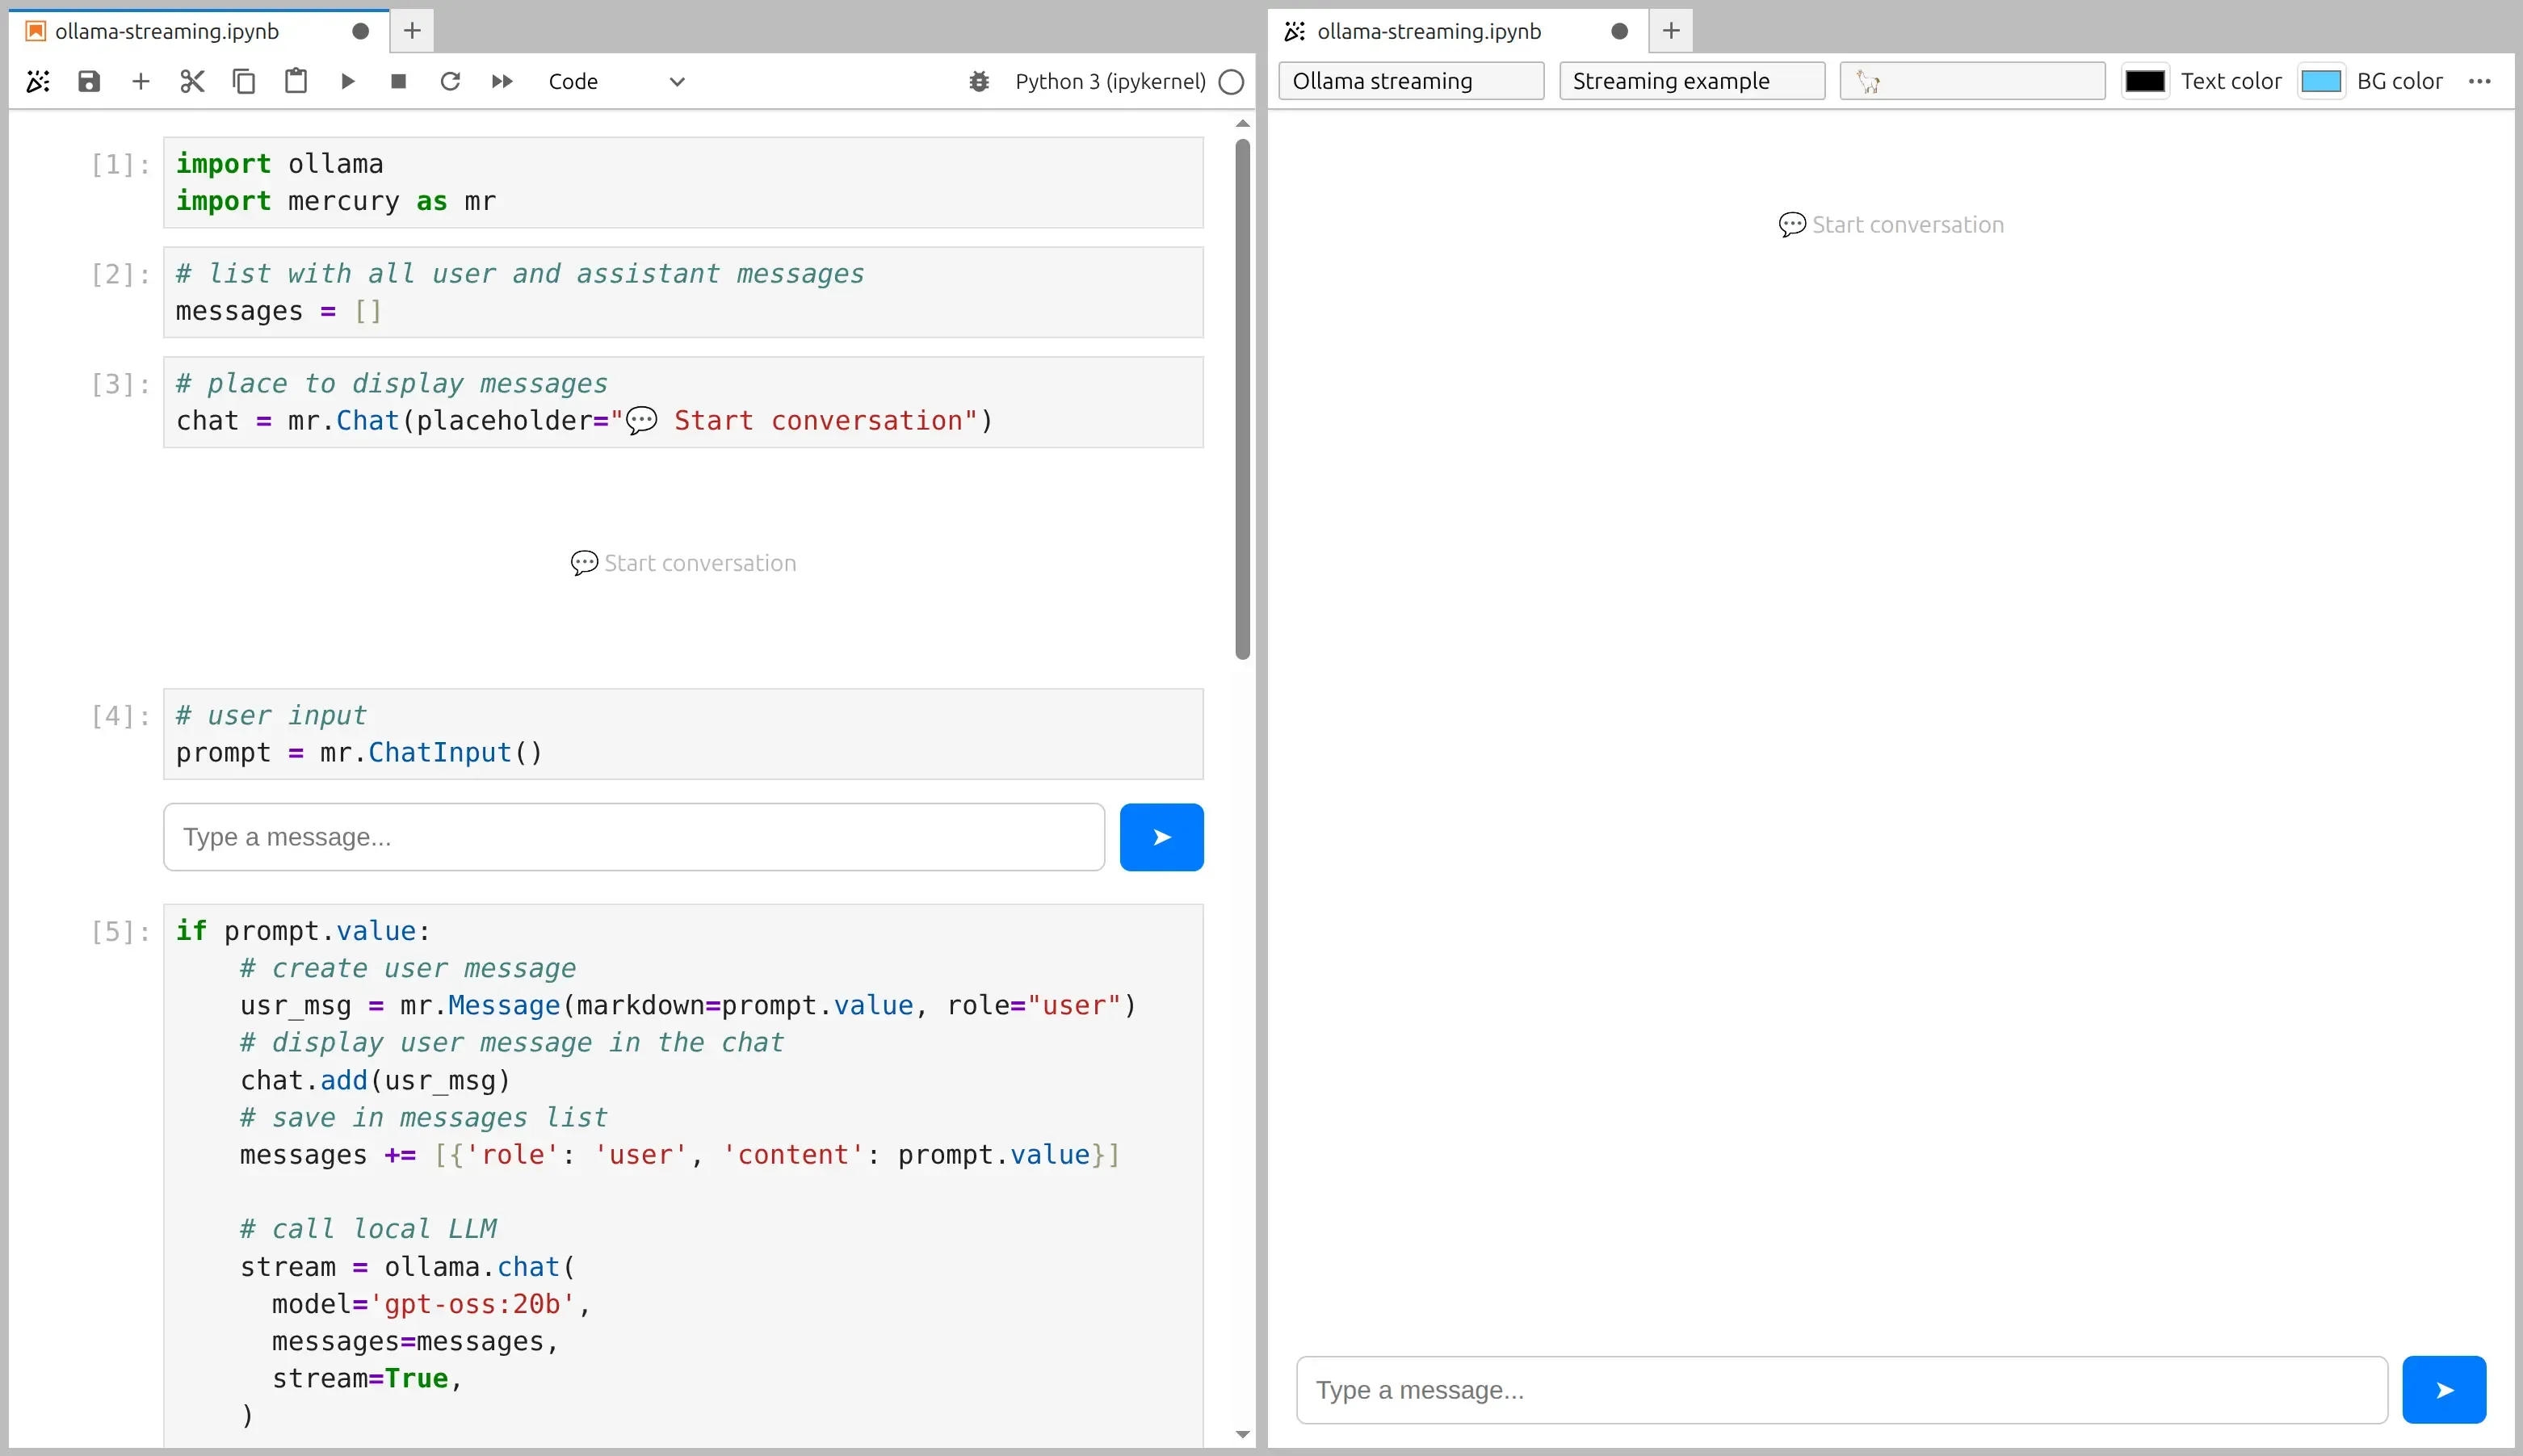
# place to display messageschat = mr.Chat(placeholder="💬 Start conversation")ChatInput widget (prompt box)
Section titled “ChatInput widget (prompt box)”We also need an input at the bottom of the app.
We use ChatInput.
# user inputprompt = mr.ChatInput()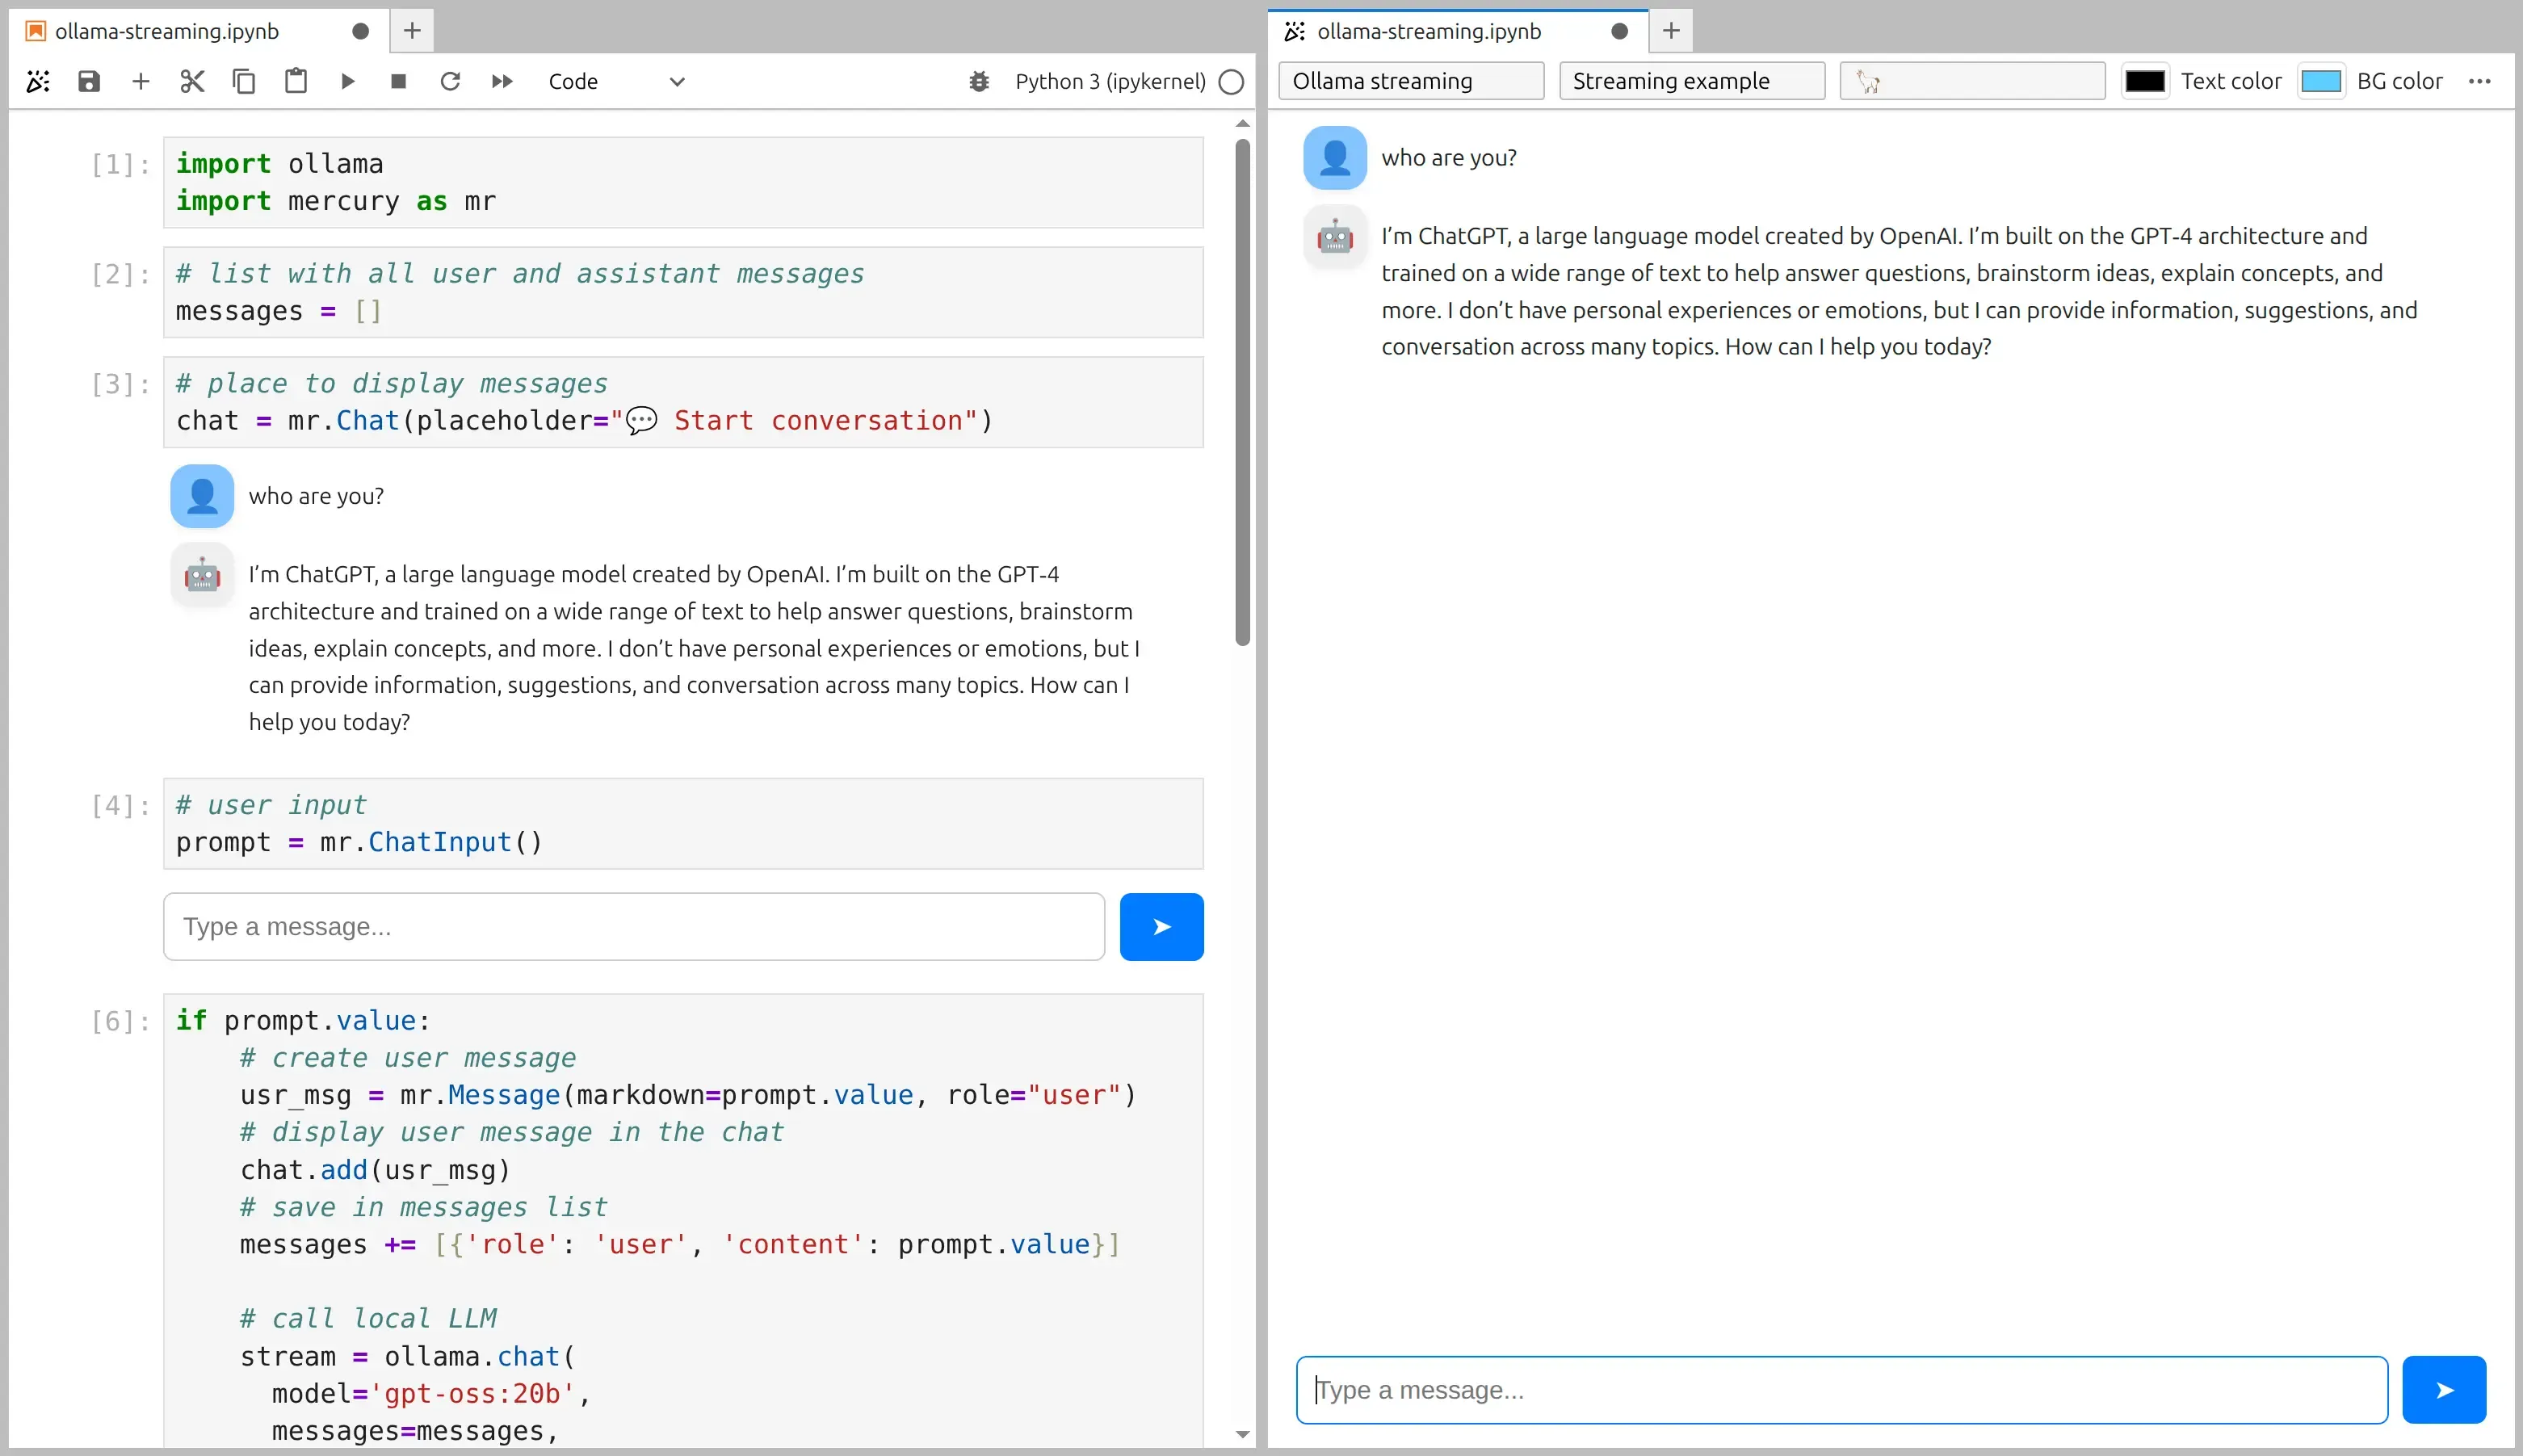
5. Stream the response from Ollama into the UI
Section titled “5. Stream the response from Ollama into the UI”Now the fun part 😊
Mercury automatically re-executes notebook cells when a widget changes.
So when the user submits text in ChatInput, prompt.value becomes non-empty and the next cell runs.
Here is the full streaming cell:
if prompt.value: # create user message usr_msg = mr.Message(markdown=prompt.value, role="user") # display user message in the chat chat.add(usr_msg) # save in messages list (history for Ollama) messages += [{'role': 'user', 'content': prompt.value}]
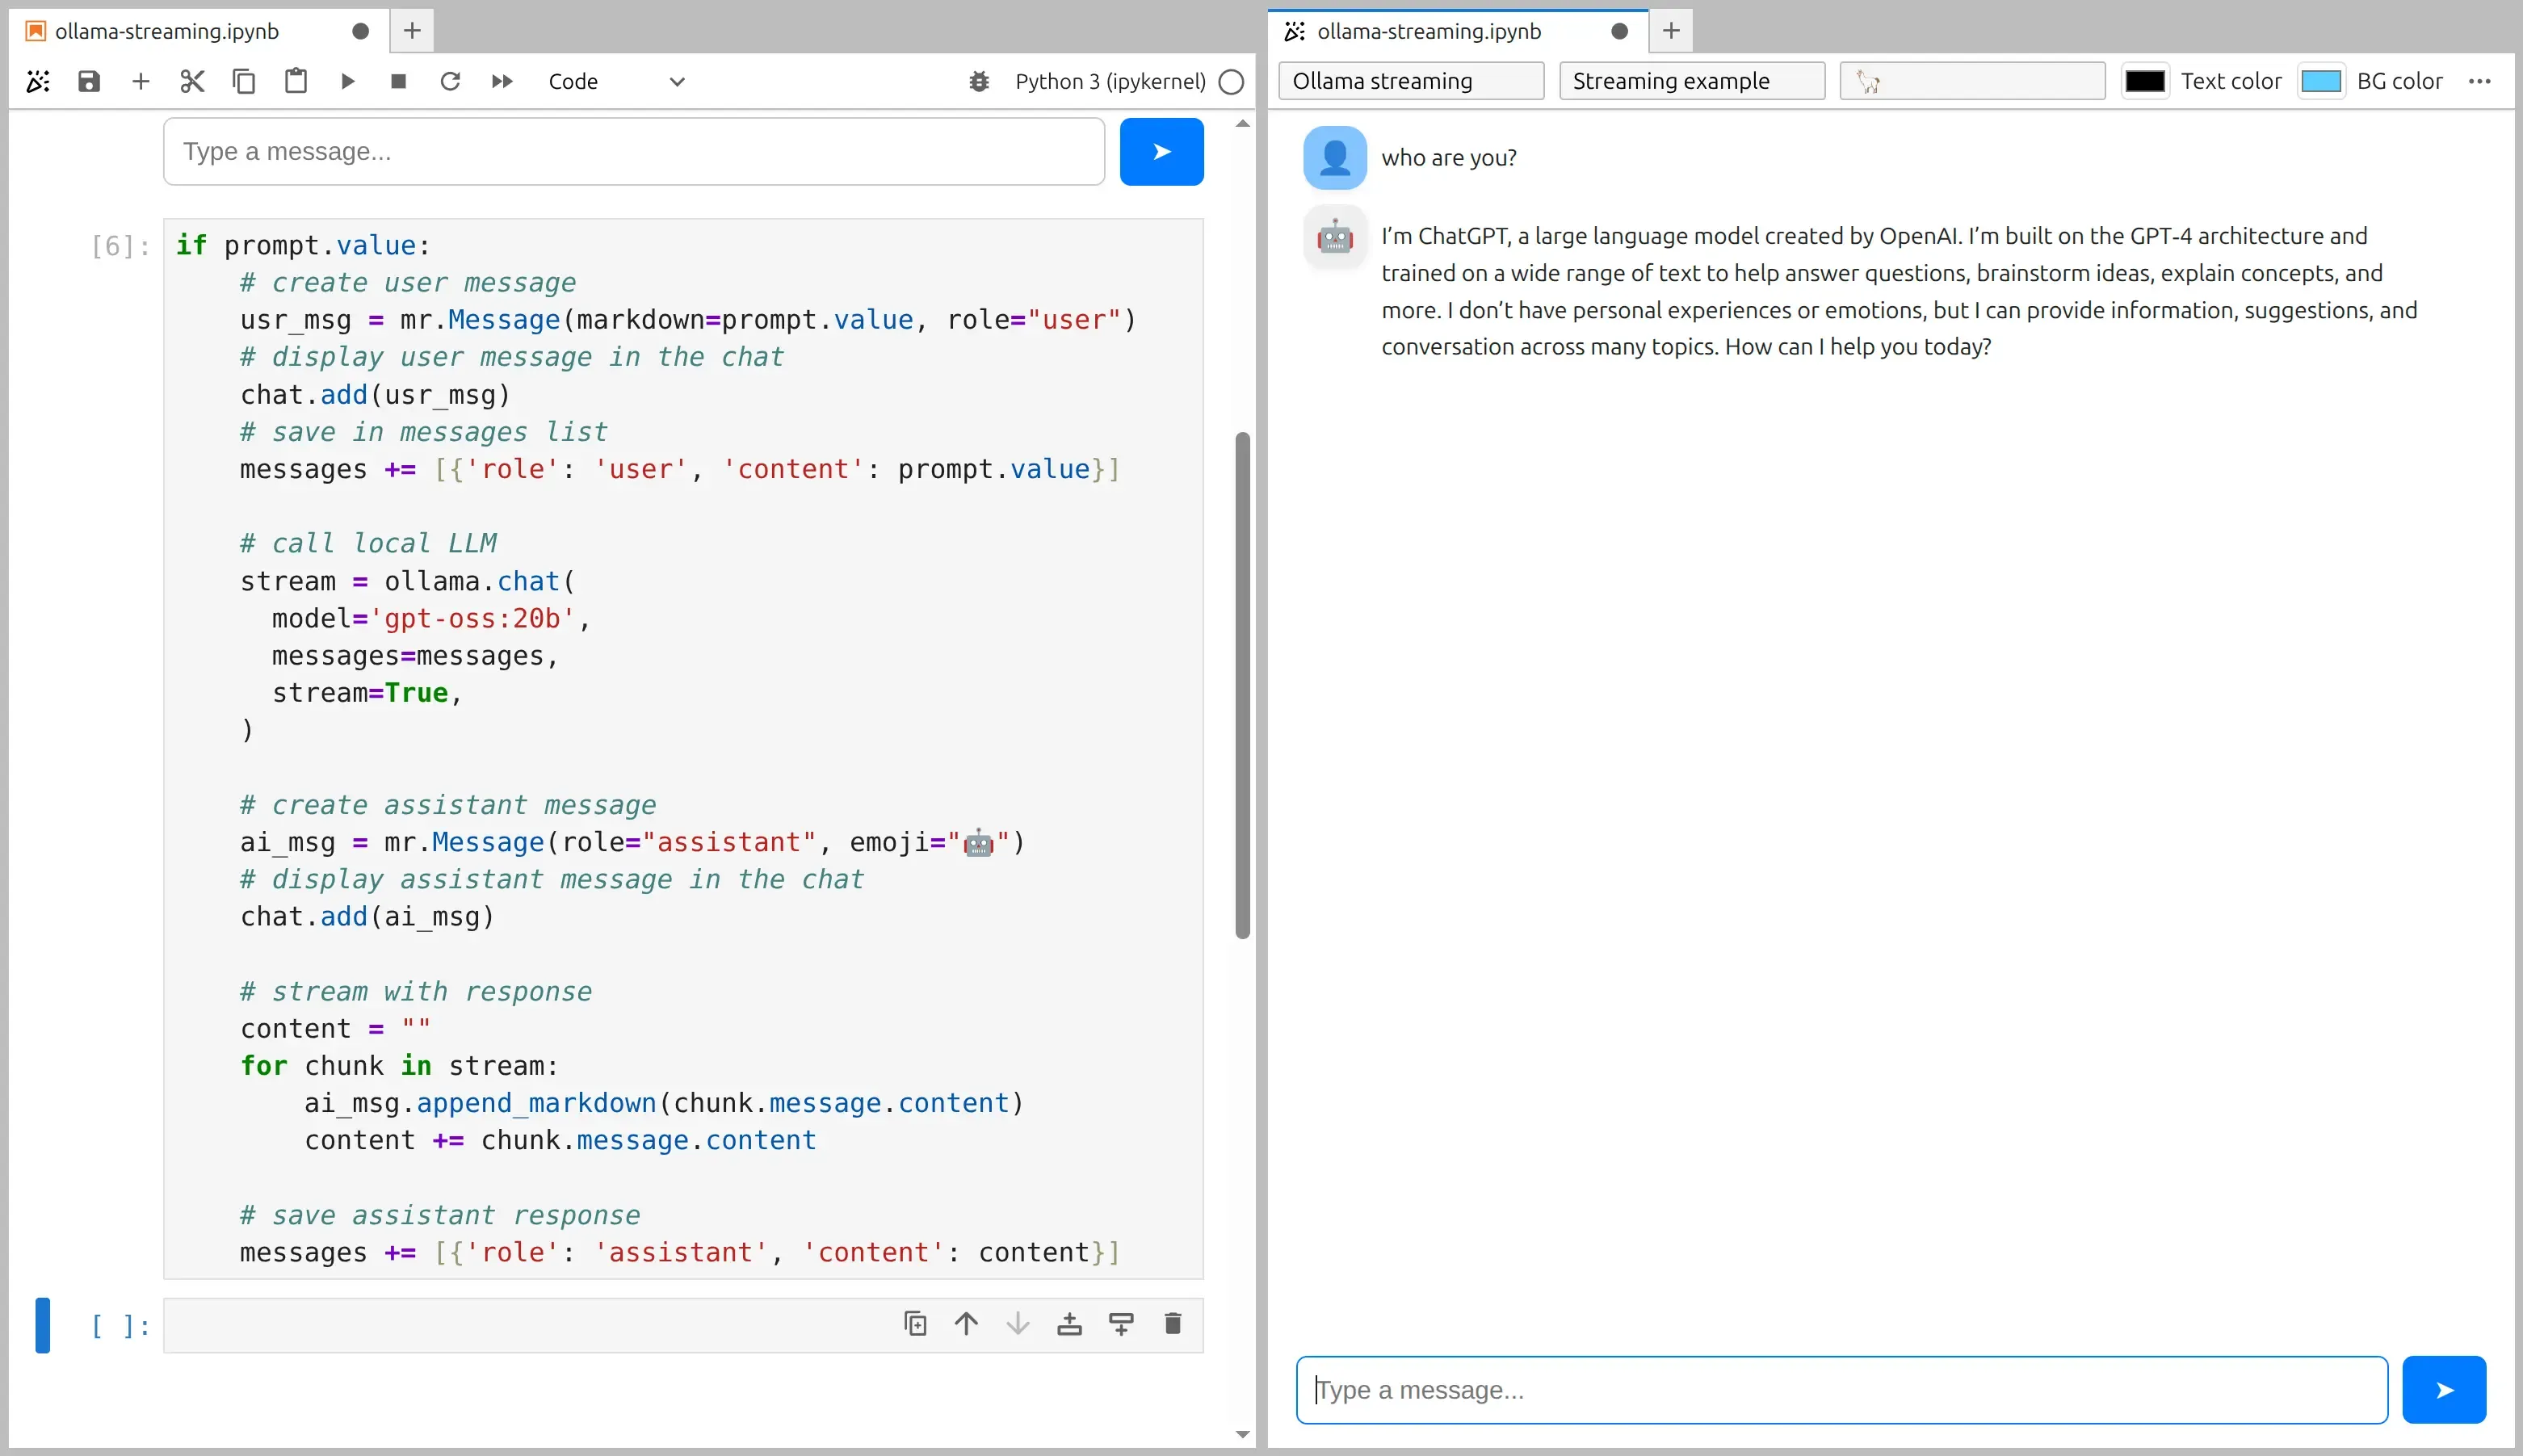
# call local LLM with streaming enabled stream = ollama.chat( model='gpt-oss:20b', messages=messages, stream=True, )
# create assistant message (empty at the beginning) ai_msg = mr.Message(role="assistant", emoji="🤖") # display assistant message in the chat chat.add(ai_msg)
# stream the response token-by-token content = "" for chunk in stream: ai_msg.append_markdown(chunk.message.content) content += chunk.message.content
# save assistant response in history messages += [{'role': 'assistant', 'content': content}]Notebook and app preview:
Step-by-step explanation (what happens here?)
Section titled “Step-by-step explanation (what happens here?)”Let’s go through the code slowly.
1) Check if the user submitted a prompt
Section titled “1) Check if the user submitted a prompt”if prompt.value:prompt.value contains the text from ChatInput.
If it is empty, we do nothing.
2) Add the user message to the UI + history
Section titled “2) Add the user message to the UI + history”usr_msg = mr.Message(markdown=prompt.value, role="user")chat.add(usr_msg)messages += [{'role': 'user', 'content': prompt.value}]We do three things:
- create
Messageobject, withmarkdownandrole - show the message in the
Chatwidget (chat.add(...)) - store it in
messagesso the model sees the full conversation next time
3) Call Ollama with stream=True
Section titled “3) Call Ollama with stream=True”stream = ollama.chat( model='gpt-oss:20b', messages=messages, stream=True,)This is the key: stream=True makes Ollama return an iterator.
Instead of one big response, we receive many small chunks.
4) Create an empty assistant message in the chat
Section titled “4) Create an empty assistant message in the chat”ai_msg = mr.Message(role="assistant", emoji="🤖")chat.add(ai_msg)We add the assistant message before we have any text. Now we have a “container” that we can update as tokens arrive.
5) Append tokens as they come
Section titled “5) Append tokens as they come”for chunk in stream: ai_msg.append_markdown(chunk.message.content) content += chunk.message.contentFor each chunk:
append_markdown(...)updates the UI immediately- we also keep
contentas a normal string, so we can store the final answer
6) Save the assistant response in history
Section titled “6) Save the assistant response in history”messages += [{'role': 'assistant', 'content': content}]This step is important for multi-turn chat. Without it, the next prompt would not include the assistant’s last reply.
6. Run as web application
Section titled “6. Run as web application”Please start mercury server application by running the following command:
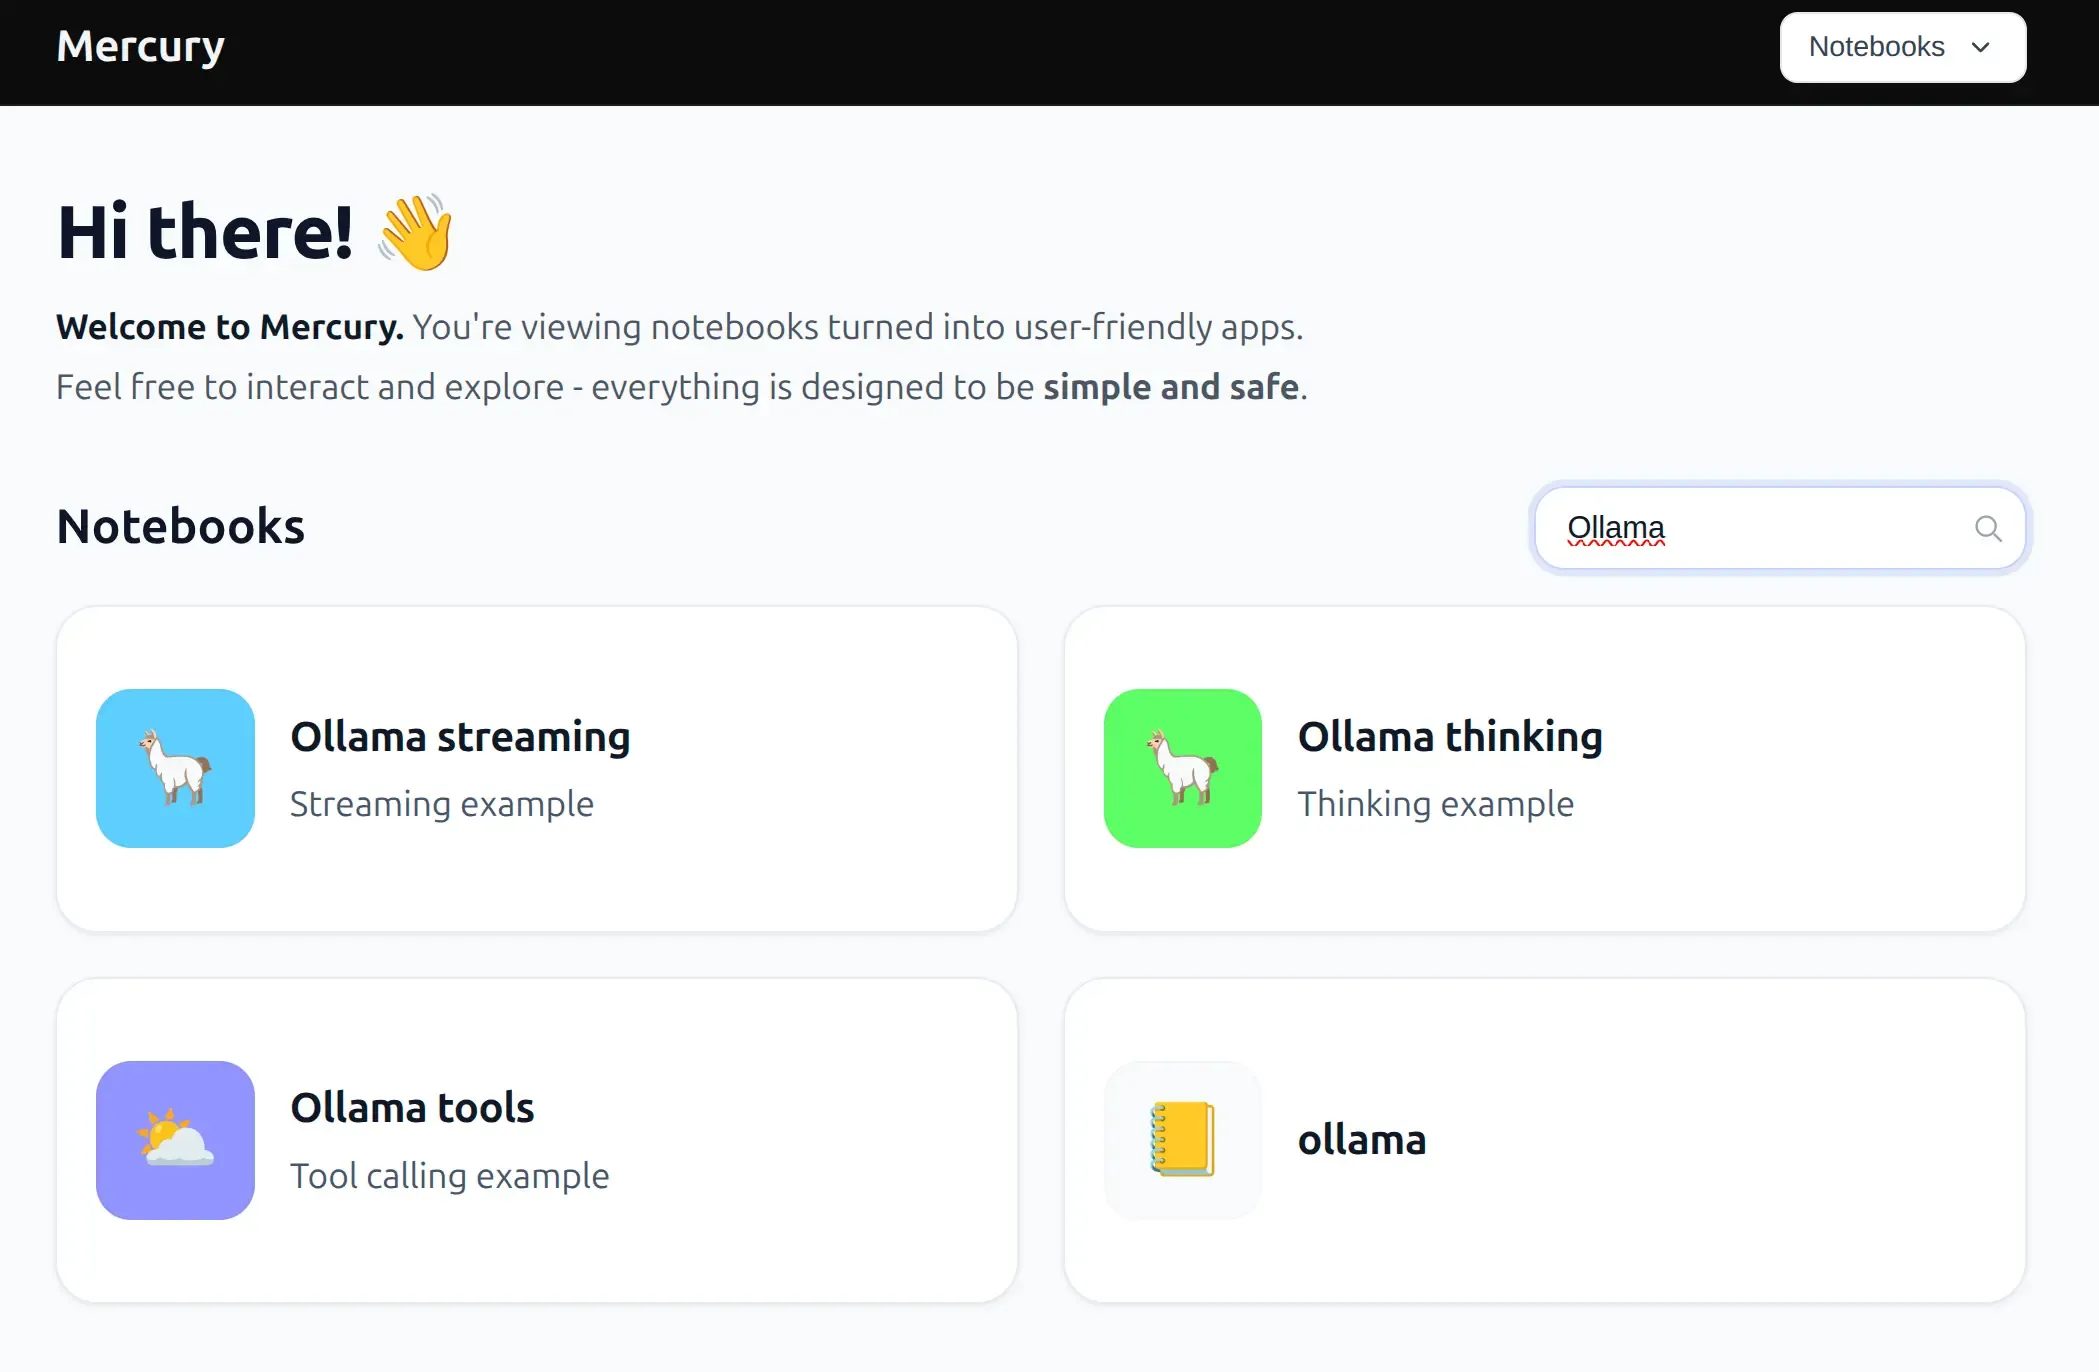
mercuryThe application will detect all notebook files in the current directory (files with *.ipynb extension) and serve them as web apps. The code won’t be displayed. After opening the mercury website you will get view of all notebooks, please just click on the app to open it.
Notes and tips
Section titled “Notes and tips”- You can switch the model name to any Ollama model you have installed.
- For better answers, keep the
messageslist (conversation history). If you remove it, the chatbot becomes “single-turn” (no memory). - If you want to clear the conversation, you can add a button that resets
messagesand the chat.
Have fun building! 🤖🎉